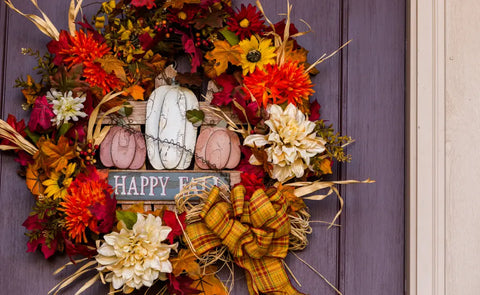
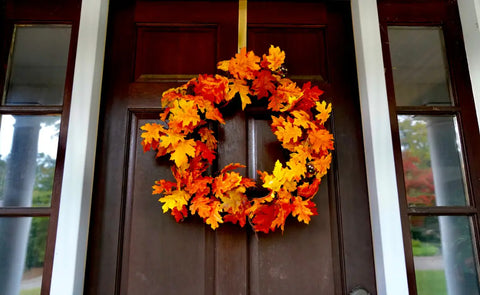
Halloween is right around the corner, and there’s no better way to get into the spooky spirit than by adding a fun Halloween wreath to your home decor! A Halloween wreath can make your house feel festive and inviting, welcoming trick-or-treaters with a touch of spooky charm. Whether you’re looking to create a creepy vibe or something more playful, a wreath is an easy way to make your home stand out during the season.
The best part? Making your own Halloween wreath is simple and enjoyable! With a few materials and a little creativity, you can craft a wreath that’s unique to your style. From picking the perfect decorations to putting it all together, this DIY project is something the whole family can enjoy.
1. Gather Your Materials

Before you start creating your Halloween wreath, it's important to gather all the materials you’ll need. Here’s a list of the basic supplies to get you started:
- Wreath form (foam or wire) – This will be the base of your wreath.
- Fabric (burlap or felt) – Use this to wrap around the wreath form for a fun texture.
- Ribbon – Choose a Halloween-themed ribbon to add color and style.
- Halloween decorations – Mini pumpkins, spiders, bats, or skulls work great!
- Hot glue gun – You’ll need this to attach everything securely.
- Scissors – To cut your fabric and ribbon.
2. Choose a Design Theme
Now that you have your materials, it's time to pick a theme for your Halloween wreath! Here are a few fun ideas to get you started:
- Spooky: Go for a creepy look with ghosts, bats, and spiders.
- Classic: Use pumpkins, witches, and black cats for a traditional Halloween vibe.
- Whimsical: Try something playful with monsters, candy, or colorful eyeballs
3. Prepare the Wreath Form

To get started on your Halloween wreath, you’ll first need to prepare the wreath form. Here’s how:
- Wrap the wreath form: Take your fabric (like burlap or felt) or floral tape and wrap it around the entire wreath form. This creates a nice base for attaching your decorations.
- Cover evenly: Make sure to cover the wreath form completely, leaving no gaps. You can overlap the fabric or tape a bit to make sure everything is secure and looks neat.
- Secure the ends: Use a hot glue gun to glue the ends of the fabric or tape in place so it stays tight and doesn’t unravel. This gives your wreath a solid base that will hold all your spooky decorations!
4. Cut and Attach the Fabric

Now it’s time to add some fabric to your wreath! Follow these steps:
- Cut the fabric: Depending on your design, you can cut the fabric into strips or shapes. For a rustic look, cut the burlap into long strips. If you’re going for something more themed, use felt to cut out Halloween shapes like bats, pumpkins, or ghosts.
- Attach the fabric: Use a hot glue gun or wire to attach the fabric pieces to the wreath form. For strips, wrap them around the wreath and glue the ends in place. For felt shapes, simply glue them wherever you want on the wreath. Make sure everything is evenly spread out and securely attached to the base.
5. Add Halloween Decorations

Now comes the fun part—decorating your wreath! Here are some spooky items you can add:
- Faux cobwebs for a creepy vibe.
- Mini skeletons or spiders for a haunted touch.
- Seasonal flowers like black roses or orange blooms to give it a Halloween feel.
- Plastic bats, pumpkins, or even witch hats for some fun accents.
6. Incorporate Ribbon and Bow
To give your Halloween wreath a polished look, it’s time to add a ribbon and bow!
- Ribbon Selection: Choose a ribbon that matches the Halloween theme. Orange and black striped ribbon is a great choice, or you can go for something sparkly like glittery fabric to make your wreath pop.
- Bow Making: Here’s a simple way to make a bow:
- Cut a long piece of ribbon (about 2-3 feet, depending on how big you want the bow).
- Create loops by folding the ribbon back and forth, making sure each loop is the same size.
- Pinch the middle of the ribbon and secure it tightly with wire.
- Fluff the loops to give the bow a full, round shape.
- Attach the bow to your wreath using the wire or hot glue.
7. Add Special Touches

To make your Halloween wreath truly stand out, consider adding some unique features!
- Unique Features: You can take your Halloween wreath to the next level by incorporating glow-in-the-dark bouncy balls. These fun, glowing additions can be scattered around the wreath, creating a playful and eerie vibe when the lights go down. Pairing them with LED lights enhances the glow and gives your wreath a unique pop of color.
- Creative Variations: Personalize your wreath by incorporating your family name or adding elements that reflect your specific Halloween interests. Love ghosts or witches? Add some custom decorations related to your favorite Halloween characters or themes.
8. Final Adjustments
Before hanging up your wreath, it’s important to give it a final check:
- Review and Tidy Up: Take a moment to look over your wreath for any loose decorations or areas that might look uneven. If something seems out of place, adjust it to make sure everything looks neat and polished.
- Secure Decorations: Check that all your decorations, fabric, and ribbon are securely attached. If you find any loose parts, use more hot glue or wire to hold them in place. A well-put-together wreath will stay looking great all season long!
9. Hang and Display

Once your Halloween wreath is ready, it’s time to hang it up and show it off!
- Hanging Techniques: You can use a door hook, a wreath hanger, or adhesive hooks to hang your wreath. Choose a spot where the wreath will be visible and make sure it’s centered and straight. This will help your wreath look its best and be noticed by everyone who visits.
- Maintenance Tips: To keep your wreath looking great throughout the Halloween season, avoid hanging it in direct sunlight or in harsh weather. If your wreath is outdoors, try to protect it from rain or wind. A little care will keep your Halloween wreath looking festive all season long!
10. DIY Wreath Variations
If you want to try something different, there are many fun ways to make unique Halloween wreaths!
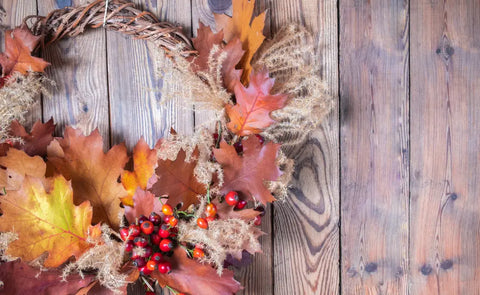
- Alternative Materials: Instead of using a standard wreath form, you can try grapevine wreaths for a natural look, or use mesh to create a more colorful and textured wreath. You can even upcycle items like old jewelry or fabric scraps to add a special touch.
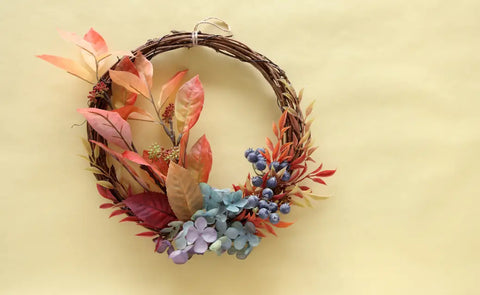
- Themed Variations: Get creative with your Halloween theme! You can make wreaths with specific themes, like a witches' wreath or a haunted house wreath. For a wreath that lasts all year, try adding seasonal elements like autumn leaves or winter berries to your design. This way, you can enjoy your wreath through different seasons!
Conclusion
Creating your own Halloween wreath is a fun and easy DIY project that brings a festive touch to your home. Here’s a quick recap of the steps:
- Gather your materials, including a wreath form, fabric, and decorations.
- Choose a design theme that fits your Halloween style.
- Prepare the wreath form by wrapping it with fabric or tape.
- Cut and attach the fabric to create a base for your decorations.
- Add Halloween decorations like spiders and pumpkins.
- Incorporate ribbon and bows for a finishing touch.
- Add special touches like LED lights or custom elements.
- Make final adjustments to ensure everything looks perfect.
- Hang and display your wreath in a prominent spot.
- Try different materials and themed variations for unique designs.
Let your creativity shine as you make a wreath that reflects your personal style and Halloween spirit. Have fun with the process and don’t forget to share your spooky creations with friends and family. Enjoy the festive atmosphere and happy crafting!
Check our collection of home party decors to add a special touch to your upcoming event or celebration. Shop now and discover unique pieces that will make your occasion unforgettable!